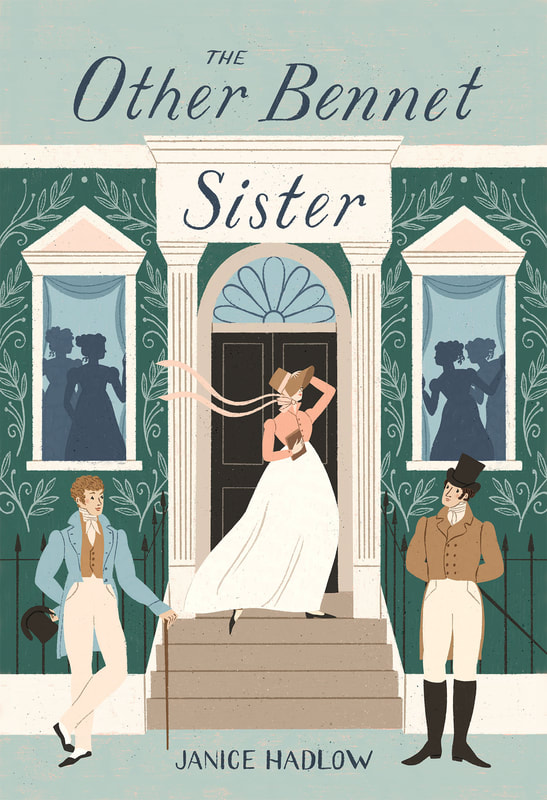
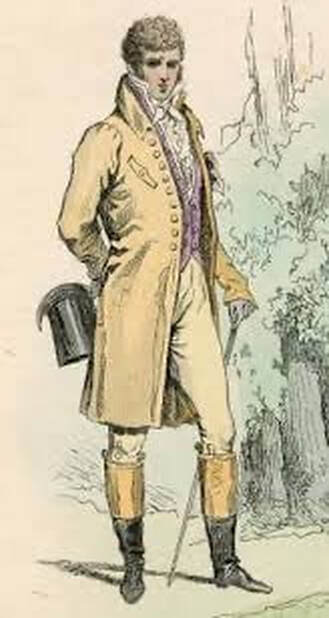
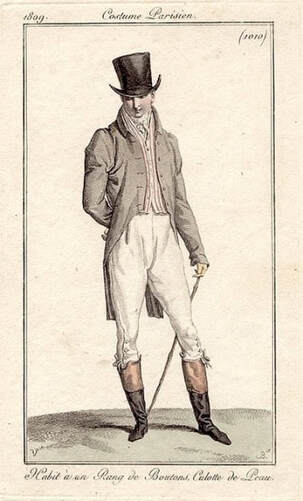
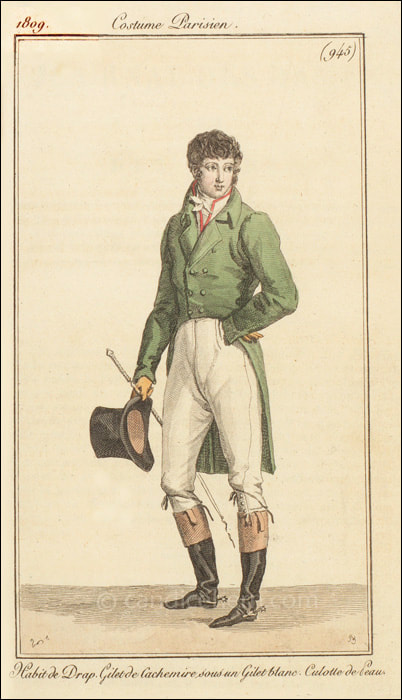
 Hello friends! One of my goals this year is to get more work illustrating book covers, something that I’ve always dreamed of doing! I’ve been working to build up my portfolio by creating my own covers of some books that I love. Over the fall I listened to a really wonderful sequel to Pride and Prejudice called The Other Bennet Sister by Janice Hadlow. It follows the story of Mary Bennet through the original novel and beyond where she finds her own happy ending. I highly recommend it and the Audible narration was great if you like to draw and listen like I do! I finally had a chance to work on the cover over the last couple of weeks and I shared a quick screenshot of my sketching process over on Instagram the other day. It turned out to be my best performing story ever! Apparently the combo of dapper regency gentlemen and sharing about my art process is a winner. So today I thought I’d expand on that fun little story and share more about the unglamorous reality behind my sketching process. I hear from a lot of people who feel discouraged because their sketches don’t look polished and pretty, or worse yet Instagram worthy. But the reality is that those things aren’t important. Sketching is for working out ideas and that is a messy and sometimes confusing process. I often have to draw something over and over again until I get the feel for it. In fact, the sketching phase for me is often the most brain boggling and time consuming part of the creative process. But it's one of the most important parts as well and so satisfying when you end up with a finished product that you love. That said, let’s dive into my sketching process for this mockup cover. 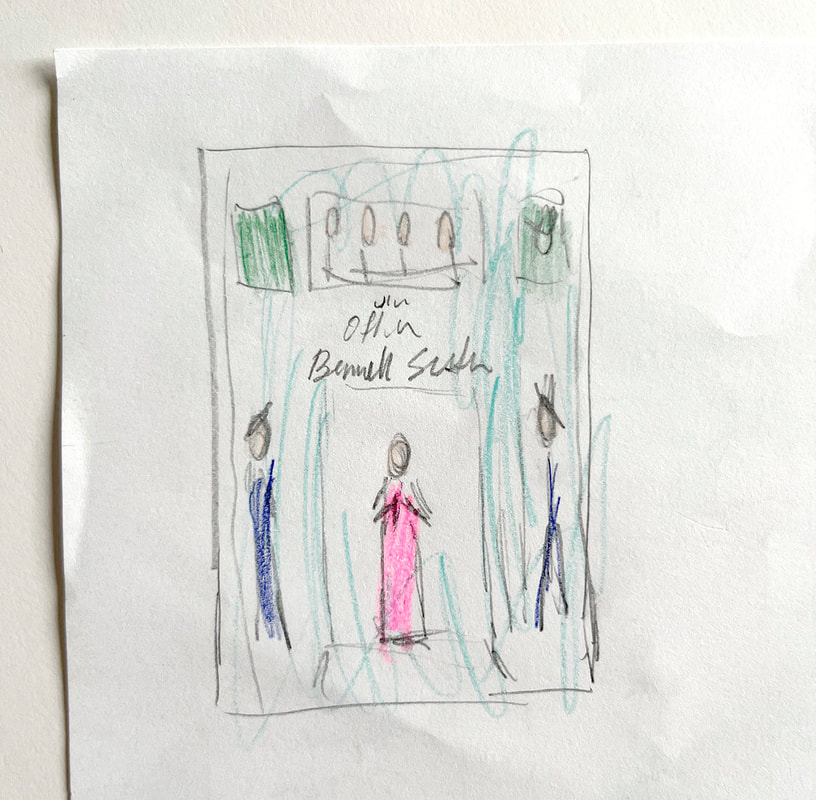 Ta-da! Here’s my first sketch. Absolutely beautiful isn’t it? My daughter thought so and decided to colour it in. I usually do quite a few of these small thumbnail sketches first to test out ideas and layouts and then I’ll pick one to move forward with (I’m going to share more about the ideation process in a future post so keep an eye out!). These thumbnails aren’t meant to be exact guidelines. They're more like quick notes, meant to get the gist of the idea out quickly. The next step is a very rough full sized sketch. Below I’ve clarified the layout and sketched in the general shapes of where things will go. Notice that I haven’t started adding any of the details yet. We don’t want to start painting the house before the walls are built! 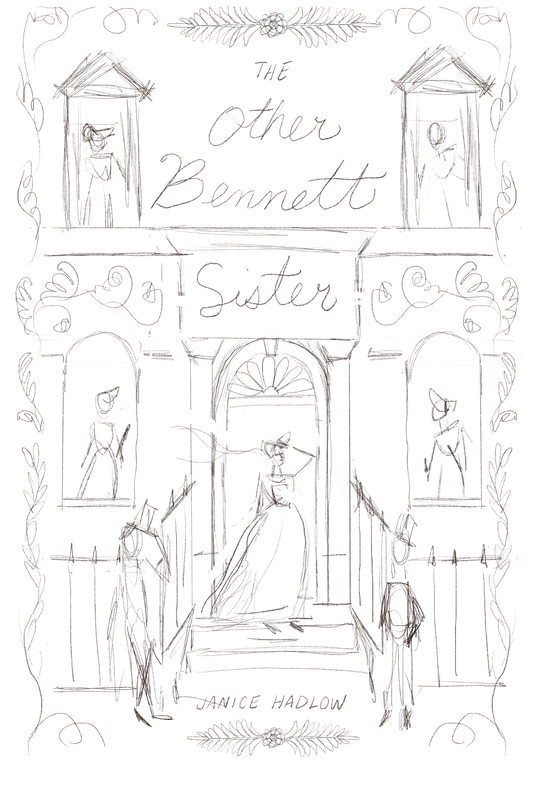 Please ignore my misspelling of Bennet! Once I have the layout nailed down I start clarifying the details in layers. I’m going to focus here on the two dapper gentlemen in the front. Unless it’s very simple, I don’t usually just draw something once and be done with it. I do a few versions. This helps me warm up and get a feel for the subject, then I choose the best version to move forward with. Here are a few versions of some regency gentlemen that I sketched out. I looked at some vintage fashion plates from the era to get a sense of what these fellows would be wearing and how they might be posing. 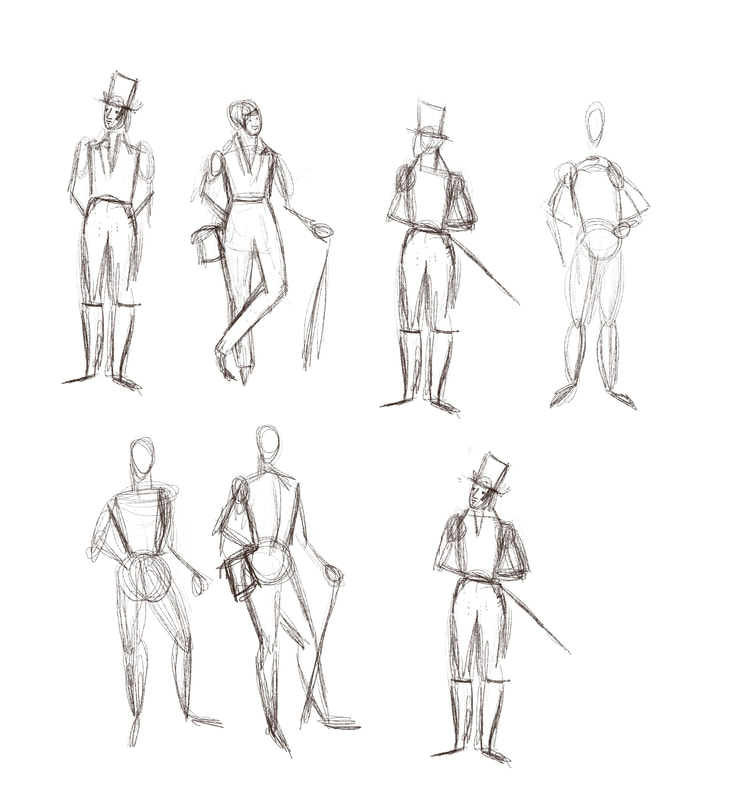
I decided to go with the two poses below because they best represented the characters' personalities and worked well together in the composition as a whole. You can see on the left sketch especially how I built these figures off of simple stick figures. See how rough my lines are? we're not aiming for perfection here. I usually scribble my pencil around a lot until I hit the right spot. 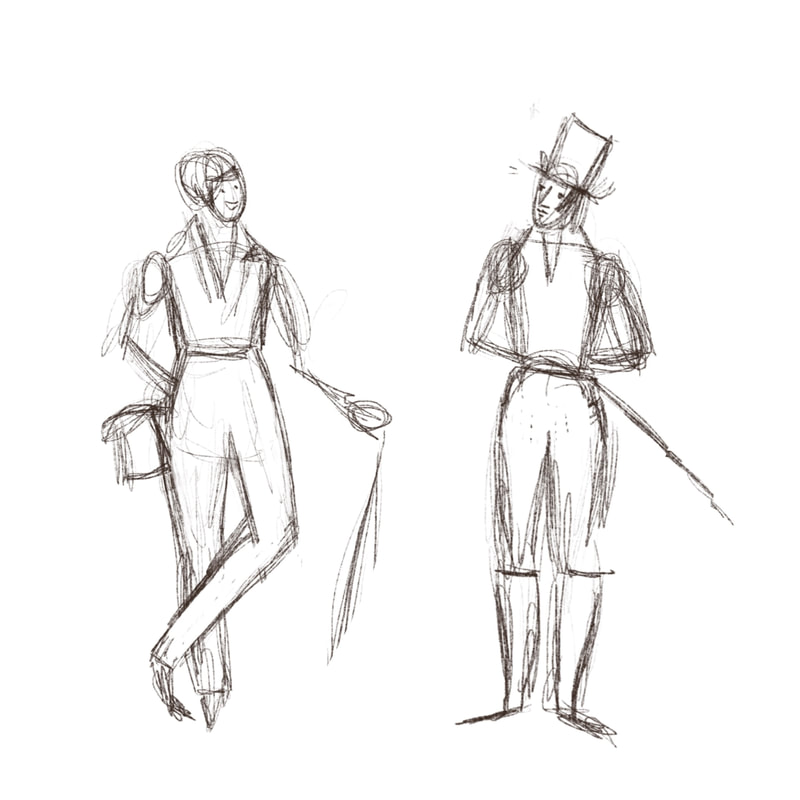 Next I start clarifying the sketch even further and here I’m focusing on getting the underlying structure of the body shapes correct so that the clothing will go on nicely and nothing looks weird or out of place. I work in Procreate on the iPad so I can lighten my under layers as I go and use them as a reference. If you don't have an iPad you can also use tracing paper, a light box or window, or gently erase your lower layers to lighten them. 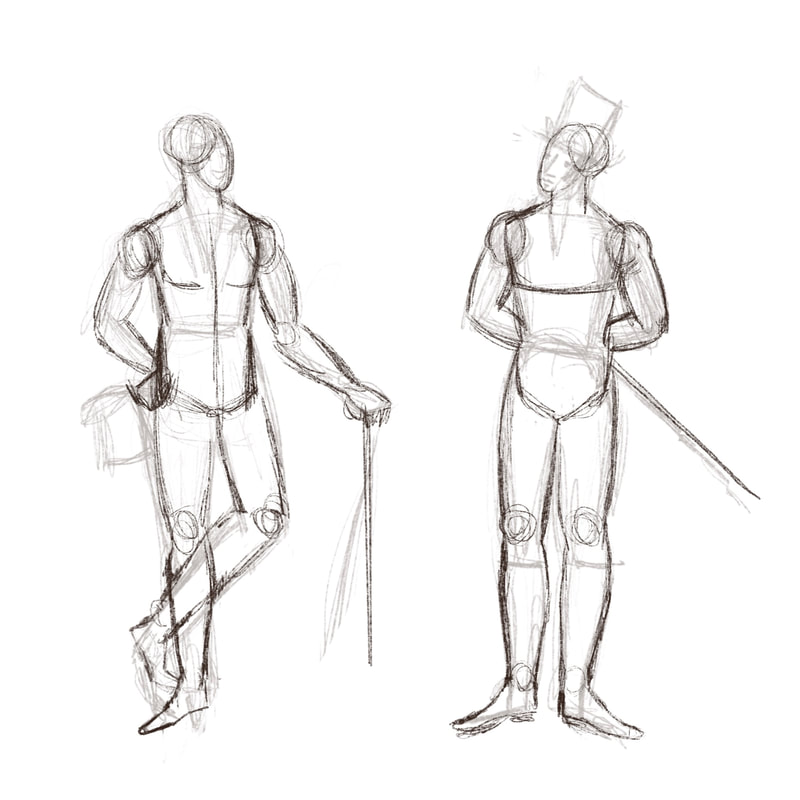 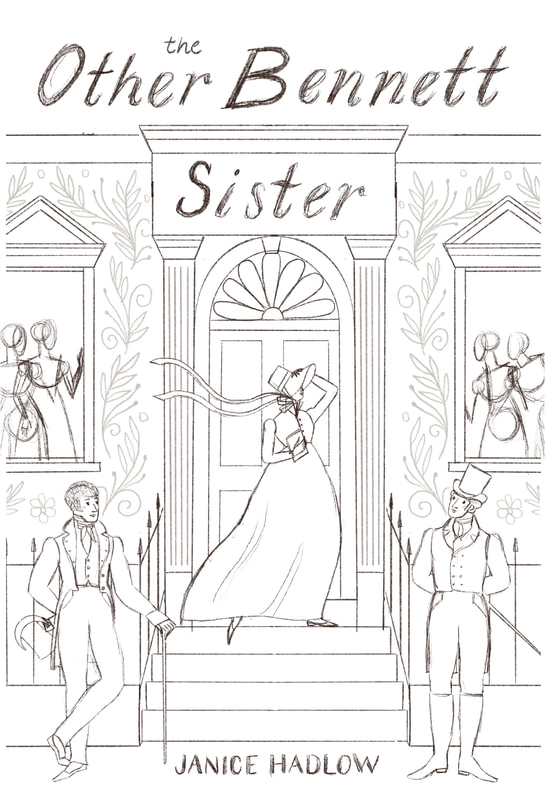 And here are the gentlemen in my final sketch. The last part of the process is where I focus on adding all of the details that make the sketch actually look like something. I feel like a lot of people just start drawing this final sketch phase first and then get frustrated when things aren’t going the way they’d hoped. The layout isn’t right and the elements are lacking finesse. I’m all for quirkiness in my illustration work but not when it compromises the overall foundation of the work. I know that not everyone works this way and that is totally fine. This is just the way that I’ve found works best for me. If you're struggling with your sketches I’d encourage you to try this technique out and feel free to change things up and try new things until you find the process that works best for you. If you enjoyed this behind the scenes you can keep up to date with future posts, products and other art news by signing up for my newsletter here, you'll get a copy of my free colour guide in the process! Thanks for reading! 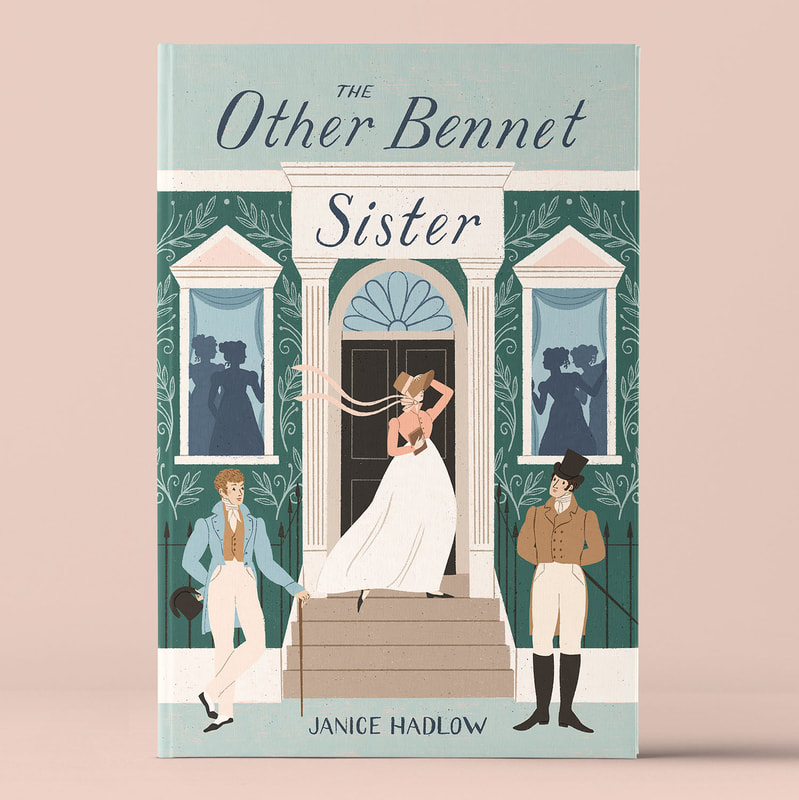
1 Comment
Bindiya
2/14/2023 06:14:37 pm
Love this Meghan.. thank you for sharing Your comment will be posted after it is approved.
Leave a Reply. |
 RSS Feed