|
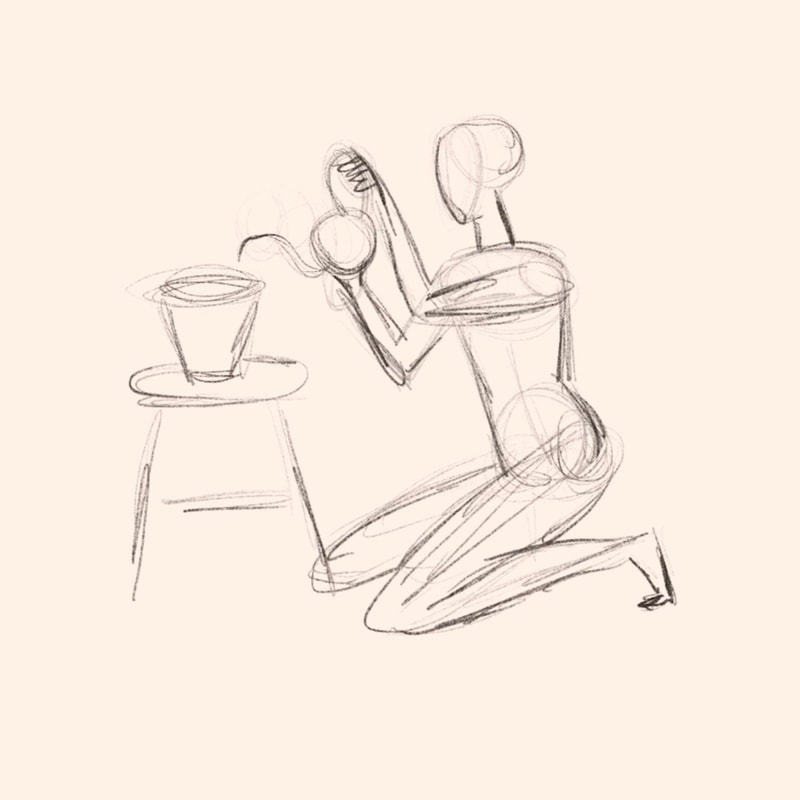
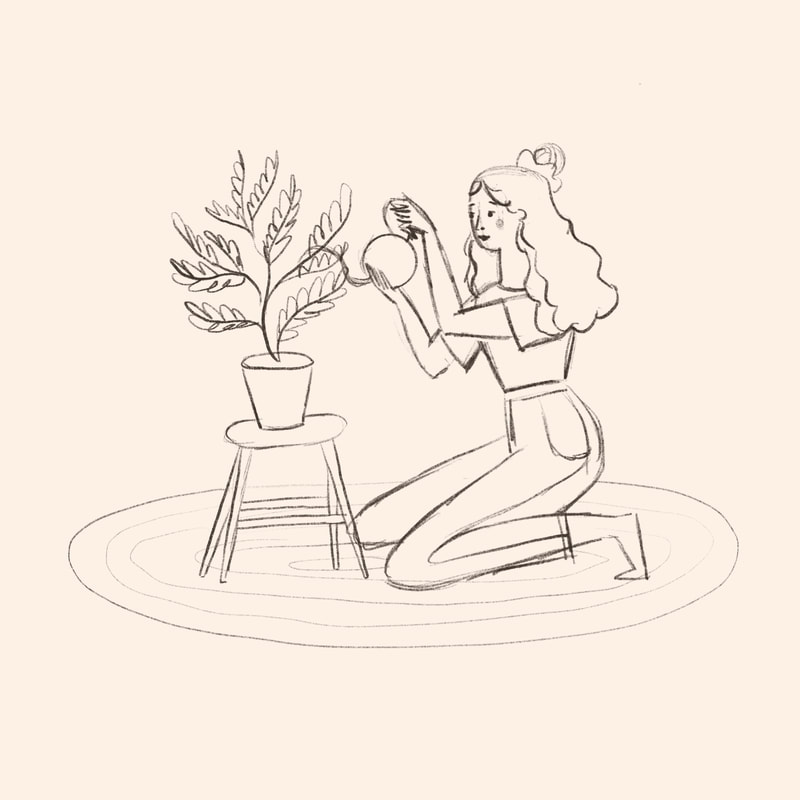
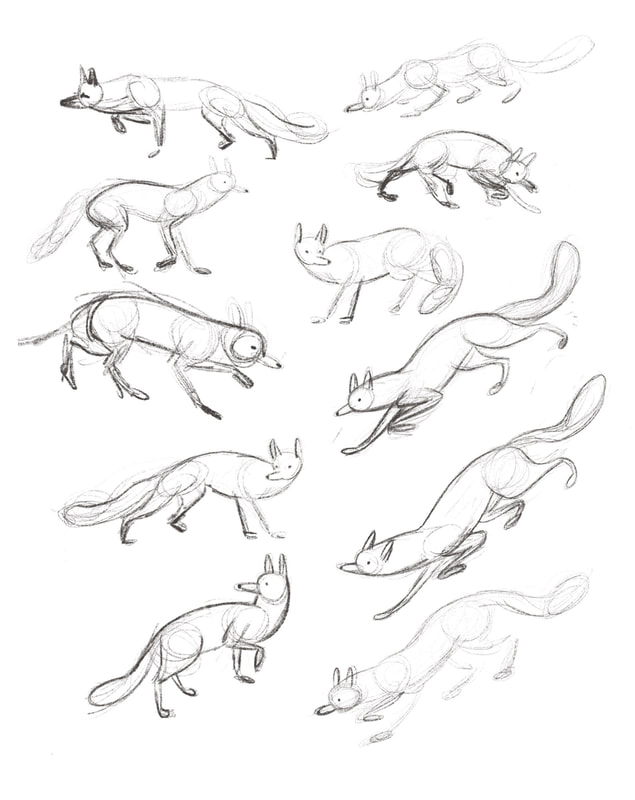
Hello friends! In my last post I shared a little bit about how I approach drawing by focusing on the shapes of the subject rather than the subject itself (go check it out if you haven't already). This week I thought I would share a little bit more about how I use that approach to tackle drawing complex subjects like animals and people, and the three main steps I go through to get to my final drawing. Step 1: Rough (The MOST important step in my process) As I said before, it starts by changing the way we see and looking for the basic shapes of the object rather than the thing itself. When it comes to drawing animals and people those basic shapes are usually circles, ovals or rectangles for the head and torso followed by lines, slim ovals or sometimes other shapes to indicate limbs. I like to think of these basic shapes as landmarks that help me lay out the structure of the subject before I go into too much detail. Because this is just a rough layer you can make adjustments as you go and not worry about getting it perfect right away. (you should see some of my sketches, they’re a complete mess!) Step 2: Refine Once (and only once!) you’ve got your rough structure laid out. It’s time to refine your sketch. Clean up any messes and start to clarify the lines. We’re looking for a basic line drawing of the subject without details at this point. In the image below you can see that I've lightly sketched out some circles to help me locate the hips, chest, head and shoulders and I've used lines to indicate the leg and arm position as well as the curve of the back. Then I've added oval shapes to clarify the limbs and started to refine the outline of the body. Step 3. Details Now is the time to finally add the fun stuff. Facial features, hair (or fur!) clothes or any other features that aren’t really important to the basic structure. This is where you can start to add your own flair to the drawing so have fun with it! Tip: If you want to draw something complicated and don't have your own reference photos, you can work from multiple sourced photos until you feel comfortable with how the structure works and then create your own pose and work from there. As with all things this method takes practice but is totally worth trying out and you’ll feel great knowing that you’ve drawn something totally unique to you! I've done this below with these foxes. The first few are drawn from reference photos that I found online so that I could get a feel for how the fox looks and moves. In the sketches further down the page I've taken what I learned and started changing the positioning to make the drawings my own. Can you see how I've broken the fox down into basic shapes first using circles for the head, shoulders, hips and tail? Then I've just filled in the body and neck with connecting lines. If you're interested in learning more about drawing people specifically, my online course, Draw Simple Figures delves deeper into this process and so much more. Learn more about the course here.
0 Comments
Your comment will be posted after it is approved.
Leave a Reply. |


 RSS Feed